Psychiatry EHR Scheduling


5
min read

August 18, 2022


You can schedule appointments with automatic notifications emailed and texted to patients when each appointment is created, as well as a reminder 24 hours before the appointment time. You can toggle between day, week, month, or agenda view in the top right corner. Agenda view shows a list of appointments for the upcoming week.
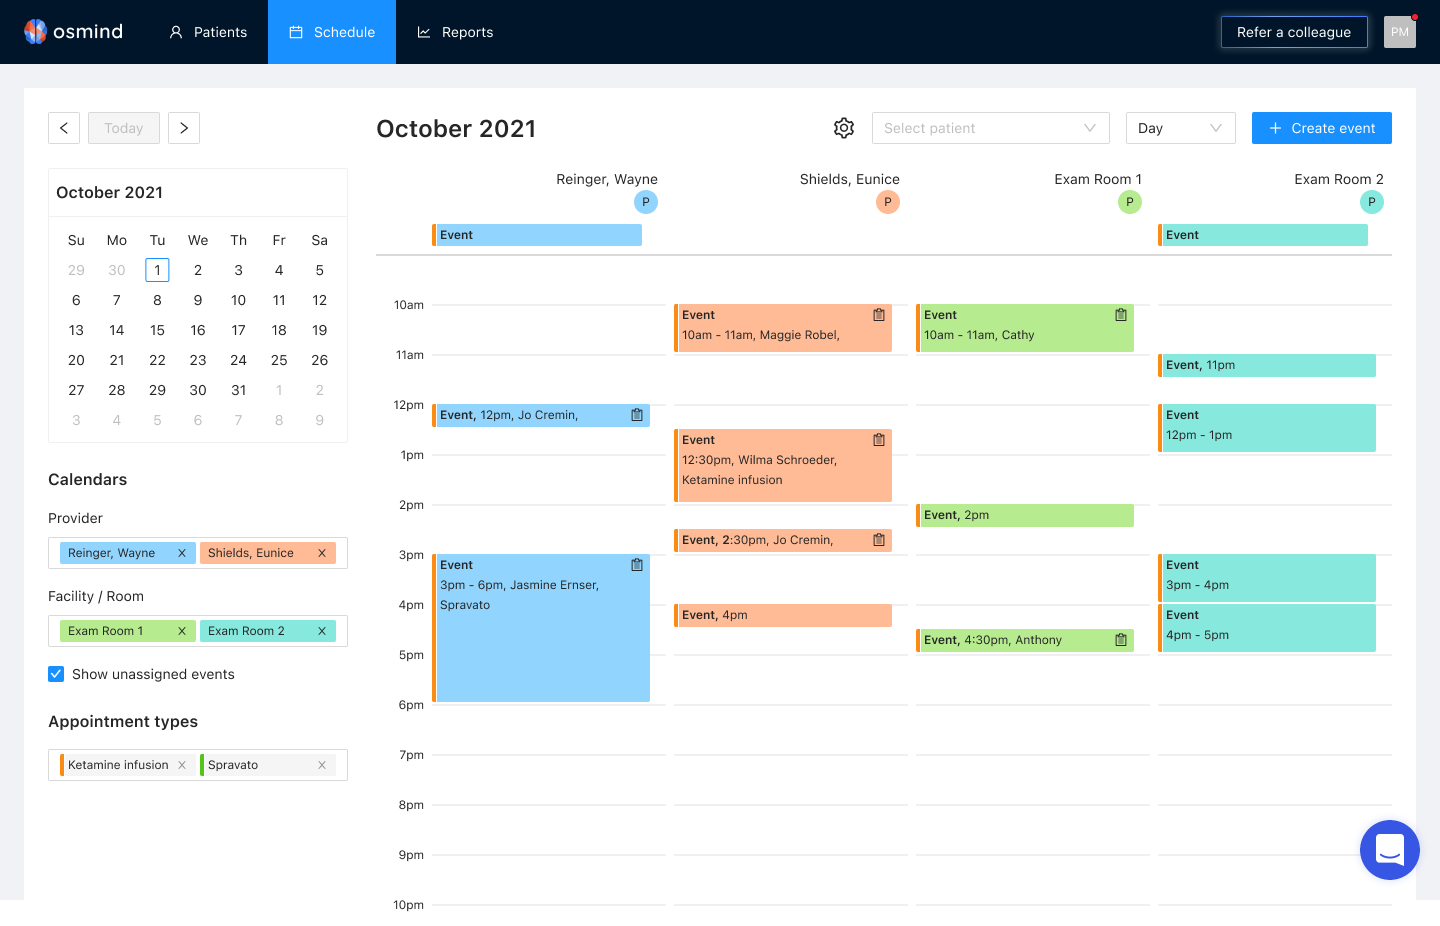
To create an appointment:
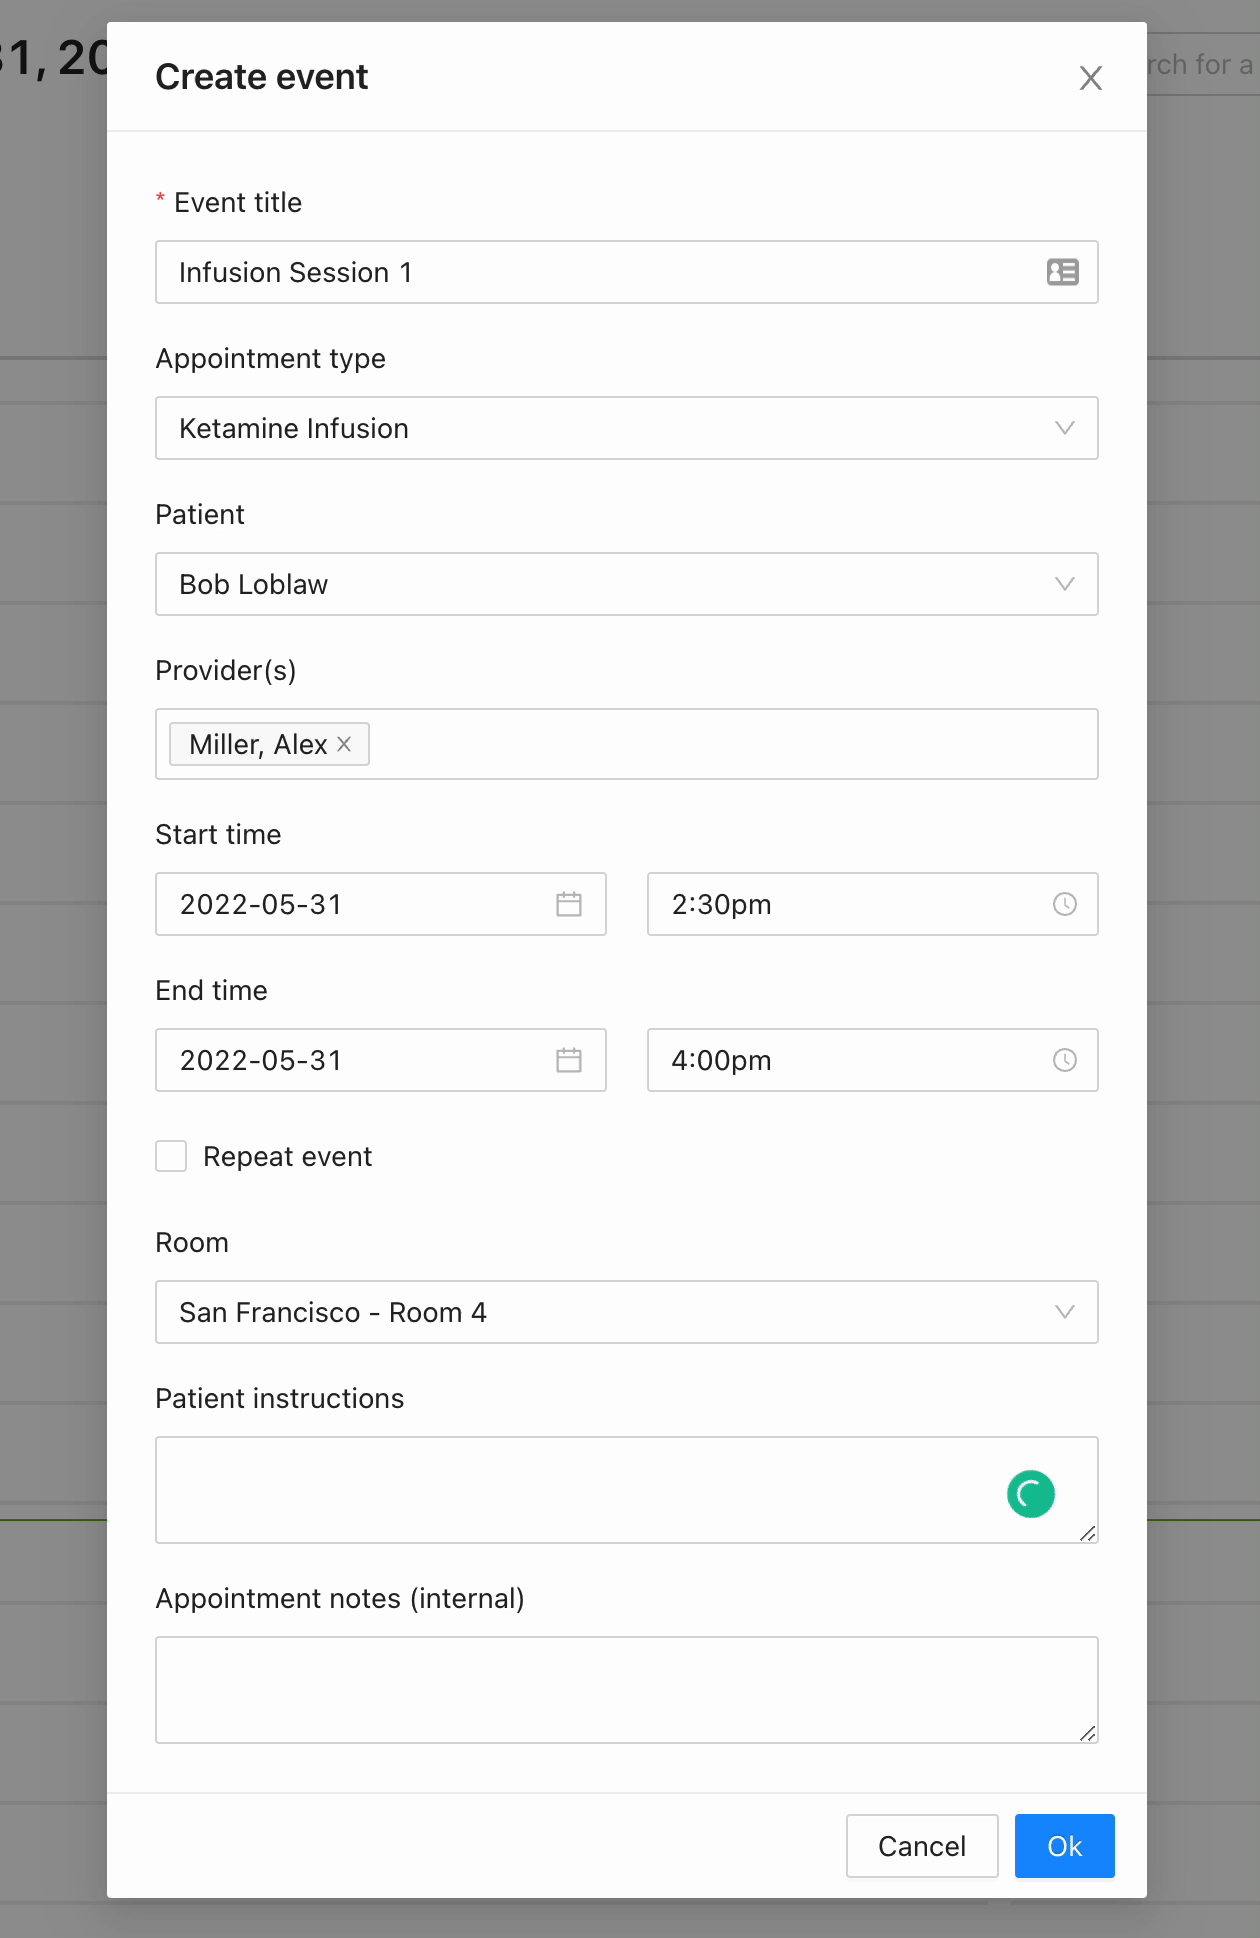
Click anywhere on the schedule or click the 'create event' button in the top right corner. Appointment details can be confirmed on the pop-up, including:
- Event title
- Appointment type (configured on the settings page)
- choosing the patient from the dropdown menu
- adding any and all providers associated
- the date with start and end times
- Room in the facility (configured on the Location settings page)
- Any instructions to send to the patient
- Any notes to be referenced solely by the clinic staff - not visible to the patient
(Note: if you can't see all of these fields, hover over the pop-up and scroll down.)
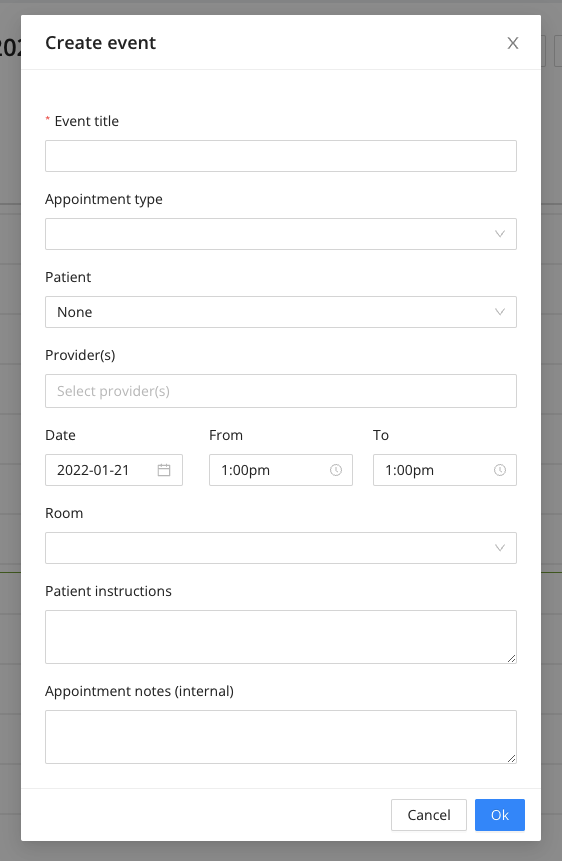
When no patient is selected, it can be used to block the calendar for a meeting or if a provider is unavailable.
If a patient is selected, you can choose to send notifications to the patient about the appointment. The important details, including location and instructions, will be sent to the patient in their email and text reminders (upon booking and reminder 24 hours ahead) if selected.
Once the appointment is set, providers can go to a patient's chart directly from an appointment using the icon in the top right corner of the event.
Settings for the Schedule:
Appointment Types
Appointment types allow you to set up predefined information for a given event so you don't have to copy/paste or type out all information for every appointment type. You can fill that information in once and then use it for any future appointment.
To create an appointment type just go to Settings > Appointment Types > Add Appointment Type. You can define specific fields for that type and it will automatically populate when you create an event for that appointment type.
- Type Name
- Duration
- Provider
- Facility/Room
- Instructions
- Color
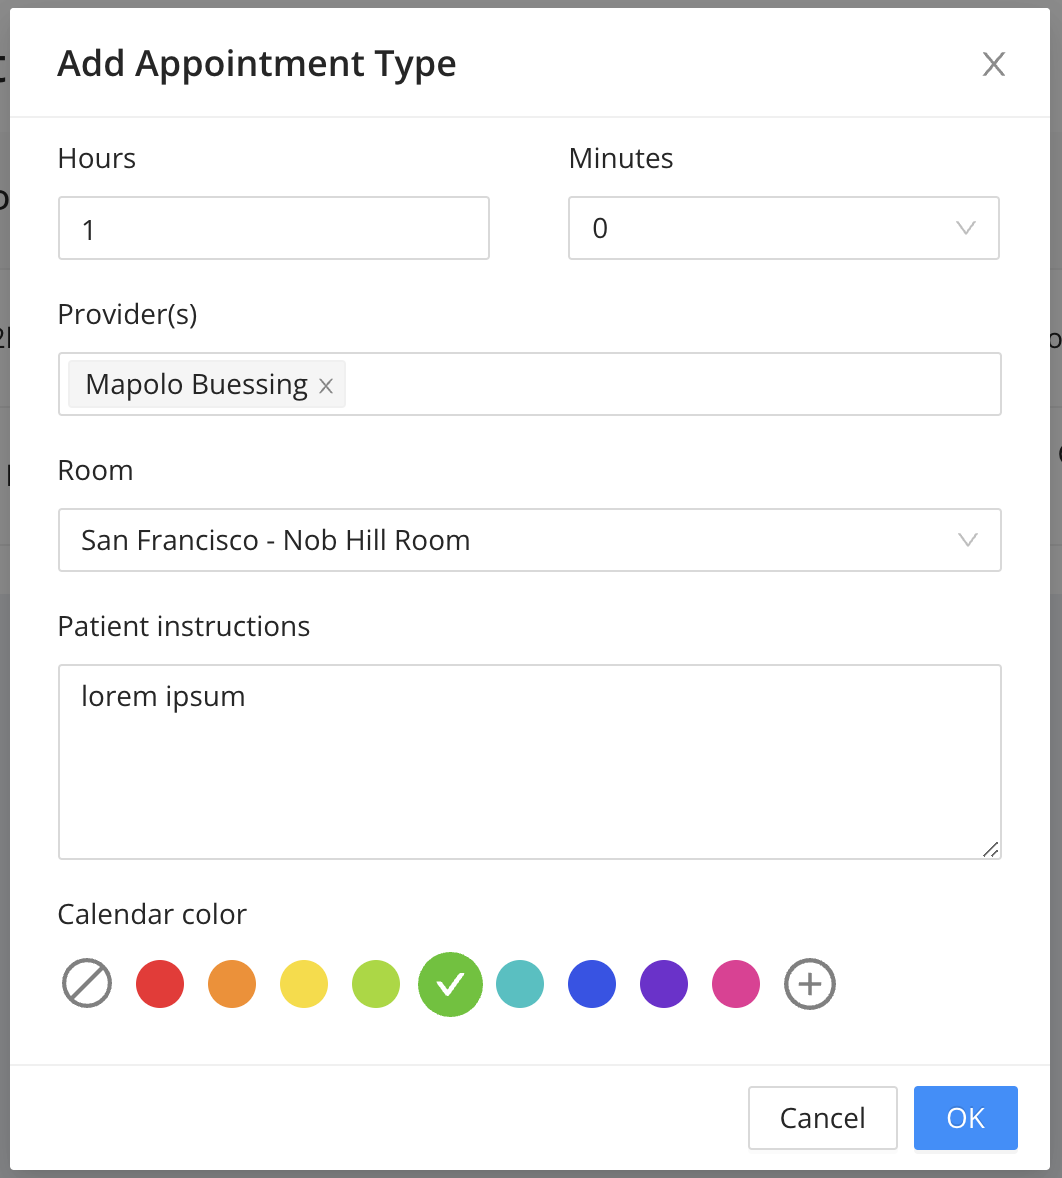
You can edit or delete existing appointment types.
When creating or editing an event, select an appointment type that you have created in the event pop-up from the dropdown.
Selecting an appointment type will automatically fill in the fields that you configured.
Note: Selecting the appointment type will override the existing fields in the event. You can always modify the event after the appointment type information is pulled in.
Locations and Rooms:
If you use multiple rooms at your clinic, you can add rooms to your practice locations.
This helps you to filter your calendar view by user and by rooms so you can quickly see where you have availability.
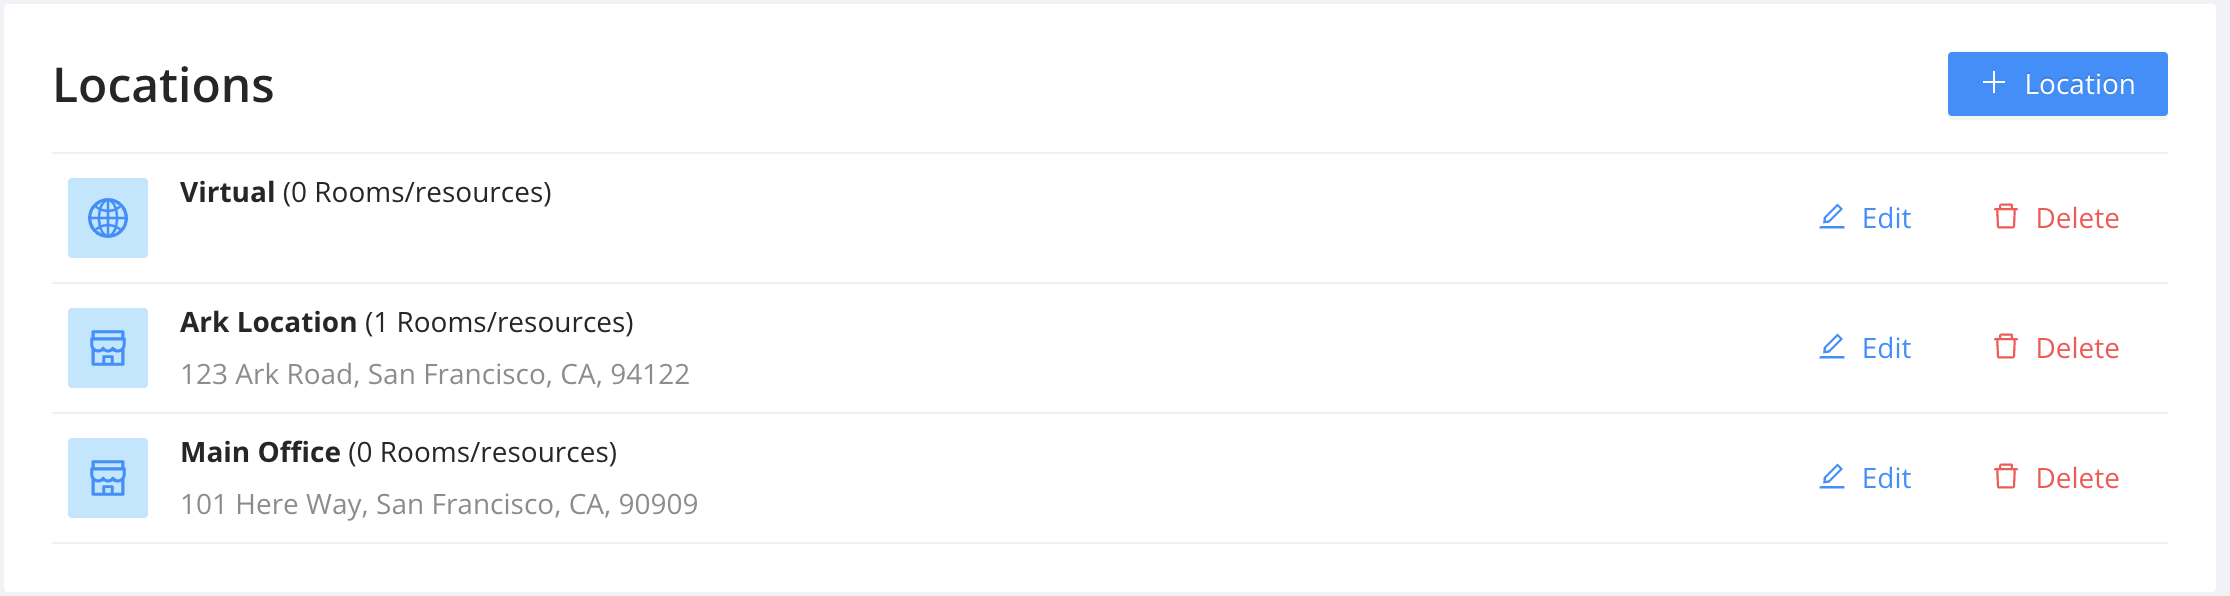
To add a room to a location, click the name of the location > + Add room/resource, then enter the name of the room.
Recurring Appointments
To create a recurring appointment, use the 'Repeat event' button. You can set:
- cadence - daily, weekly, weekdays, monthly, or yearly
- repeating - how often this event occurs
- length - number of events, or end date
When editing or deleting, you can chose if the change is just for the event selected, all future events, or all events total.

If you, or someone you know, is in crisis or needs immediate assistance, please call 911 immediately. To talk to someone now, please call the National Suicide Prevention Lifeline at 1-800-273-8255.
Osmind Inc. © 2024 All Rights Reserved.